Freedom of Motion Alpha 4

by Taylor Hadden | 0:01

A Refinement Update

It’s been seven months since Alpha 3. A bit long, but we’ve been keeping busy.

The advent of the fully-featured Personal Edition of Unity 5 let us integrate the Mecanim inverse kinematic solution. The motion and behavior of this system was dramatically different from our previous home-brewed solution, and that meant that we had to edit nearly every part of the climbing code, sometimes significantly. We also spent a lot of time looking for and ironing out jerky transitions between motions. The result is a feature set that isn’t all that different from the last alpha, but we hope those behind-the-scenes changes make the gameplay as a whole more enjoyable.

We did add a few new features though: falling damage, death, and checkpoints. Simply put, landing from too high a height will kill you, though you can hold crouch to roll when you land and cushion your fall considerably. This makes high places feel particularly precipitous and lends a new dimension to levels. We also made movement over half meter blocks and stairs much smoother, and you no longer stutter-fall down them.

Included in this release are three levels: Pillars, The Pit, and Tower. Their alphabetical order is also their order of difficulty (and Tower is very difficult). They all assume that you’re familiar with the controls, so check the readme included in the download.

An incomplete changelist, in no particular order:

  • Added a couple new textures
  • Added the ability to generate levels with a different starting texture
  • Entity and player data can be arbitrarily stored in a level (supporting custom player information per level)
  • The player now saves the last spawn point it touched and will spawn there upon death
  • Integrated the Unity 5 IK system
  • Sprinting has different maximum values depending on which direction you are going
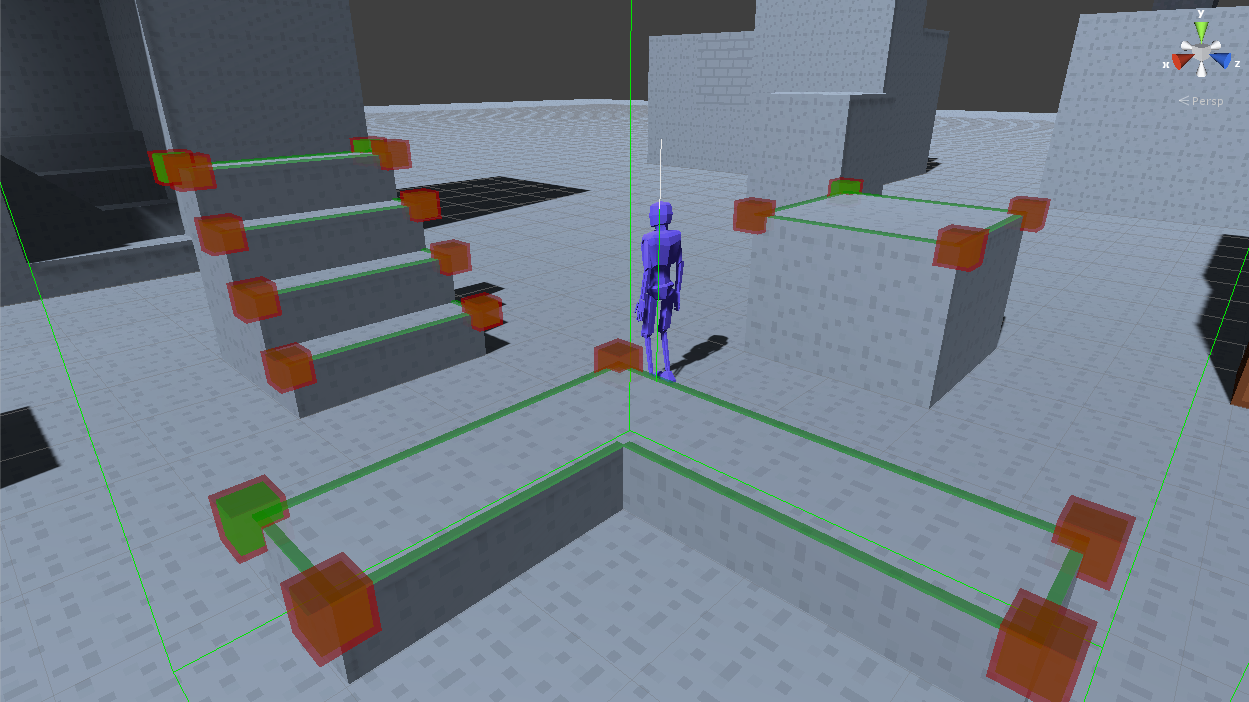
  • Ledges now track obtuse corners
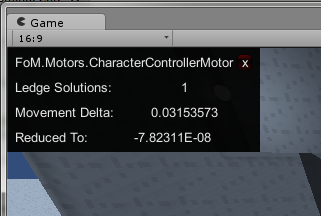
  • Ledge information is used to facilitate going up and down half-meter blocks and stairs
  • Moving into a ledge hang or cling now uses spring dynamics to preserve momentum and provide a smoother transition
  • Made it so hands must be a minimum distance from one another
  • Hands moving on a ledge accelerate out of a standstill
  • Feet transition between ledge positions more smoothly
  • Fixed several cases where you could mount a ledge at inappropriate times (such as through walls or behind you)
  • Fixed an issue where when moving laterally between ledges you sometimes moved too far
  • Added back the ability to edit blocks on the octree grid by holding Alt
  • Added the ability to climb up and vault into gaps that are at least 1m high (previously only allowed for 2m gaps)
  • Added falling damage
  • Added damage from going too fast (allows for death by bottomless pits)
  • Pulling up onto a ledge first separates your hands to an appropriate distance. Which hand is chosen by which direction you are trying to move.
  • Holding the high profile button (sprint) speeds up all ledge movements
  • Added a threshold where if you are going too fast when you grab a ledge, you take damage. If you are damaged past a certain threshold, you cannot hold onto ledges and will fall.
  • Made it so that you can vault up 1 meter ledges without holding high profile
  • Some motions require that the player has settled somewhat into a static ledge hang before they can activate
  • Fixed a bug where settings weren’t being reverted and applied correctly in the Options menu
  • Restricted the player’s head while hanging from a ledge so that you can’t clip the camera into the wall
  • Fixed an issue where if you transitioned from a slide to a crouch in a 1m high tunnel the camera would clip into the ceiling
  • Fixed an issue where going around a ledge was blocked if the ledge was .5m wide and next to a wall
  • Added a soft-targeting system to ledge jumps where the jump will try to sent you in the appropriate trajectory to land on the ledge you are looking at.

Future Plans

For the next release, we will be focusing on improving the editing tools. This will include a new tool for editing voxel data, an interface for selecting what blocks you have selected, and an interface for browsing and placing entities like lights, text, and spawn points. We also have a custom material editor in the works that will let us quickly create new block types. We’re trying to keep the scope of this cycle a little more controlled, as it took a little too long to get this update out the door. As with the previous alpha, you can follow our progress on Trello.

The Science of Debugging

by Taylor Hadden | 17:37

Debugging is the worst part of programming. It is frustrating, demoralizing, and at the end, when you finally find the source of the bug, you more often than not come face to face with an example of your past stupidity. You can spend hours, even days, just trying to find the source of one issue. A bug so inscrutable that you know that you’re looking at the source of the problem, but for the life of you, you just don’t see it. Or worse, a bug that only happens intermittently, leaving you feeling like you are building with shifting sand.

Sound like you? Welcome to the club. A person who hasn’t smashed headlong into one of those problems is not yet a programmer. These are the issues we’ve cut our teeth on, pulling out plenty of hair along the way. In any case, I’d like to share the methodology I’ve developed for tackling debugging. Hopefully, it will help make the process a little less stressful. I’m going to be specifically referencing Unity 3D tools, but the broad methods will work with any environment.

Step 1 – Make it Repeatable

A bug that you can’t reproduce is of no use to you. If you don’t know how to cause the issue every time, you won’t be able to test it. If you can’t test it, you don’t know if you’ve fixed it. Sometimes, you’re going to have to set up a specific test case to make it happen reliably. Do it. A little prep work now will save you lots of time later. You can also consider using a Testing Framework to simulate the conditions where the bug occurs. Unity provides a good set of tools for this, though the specifics of using it is outside the scope of this post.

Step 2 – Form a Hypothesis

If you’re very familiar with your codebase, you’ll likely already have an idea of what the problem is. A null reference exception is going to point you right to the problematic line. Otherwise, it’s time to go into research mode. You need to get your program to give you information about what’s going on.

Many people like to use debuggers to step through their code line-by-line, but I do not. My most troublesome bugs are often buried inside loops; the same block of code will run 500 times before it does something wrong. My preferred tool is simply writing text to the console. In Unity, this is the Debug.Log() function. When you write a console log, be specific. You need to know the context in which the error is occurring. Posting “It done broke!” isn’t going to help you much. Include any values of interest to you, or anything that can help identify, say, what instance is causing the problem.

A window with messages from a specific object.

A window with messages from a specific object.

Often in game development, you’ll need to know a piece of information every frame. Lots of console logs would be impossible to sift through. The simplest way to display this information in Unity is by exposing a variable in the Inspector. Alternatively, you can use Unity’s GUI and GUILayout functions in a MonoBehavior’s OnGui() function to draw text to the screen. This can be a little tedious to setup and organize, so I created a custom logging window system to help me organize information on the screen.

You can also create visual debugging aids. Debug.DrawLine() and Debug.DrawRay() are both invaluable tools when trying to figure out vector math, and can be called right inline like any other Debug call. If you need more detail, using the Gizmos functions in a MonoBehavior’s OnDrawGizmos() function will let you draw simple colored primitives.

Gizmos.DrawCube() used to display ledges and their connections.

Gizmos.DrawCube() used to display ledges and their connections.

Ultimately, all of these tools are there to serve as sanity checks. They confirm whether your code is doing what you think it’s doing or not. If you can see the bug, you will have a better idea of where to look for the cause. Hopefully, that will lead you to a line of code that you’re pretty sure is wrong.

Step 3 – Test the Hypothesis

So you think you’ve found and fixed the source of the bug. Test it! You’re probably wrong. That’s okay, go to the next step.

Step 4 – Question Your Assumptions

I notice that I am confused…

Your hypothesis was wrong because you are making an incorrect assumption about some underlying function or mechanism. Computers aren’t out to get you; they only do what they are told, and us idiots are the only things telling them what to do. It’s time to go back to our tools from Step 2 and really buckle down. If an object is acting like it’s in a state that it shouldn’t be in, confirm that it actually isn’t in that state (it is) and find out what caused it to get there (that bastard). If a function is purporting to do something, don’t just trust its name or its documentation; check the results. Make sure that events that are order dependent are actually occurring in the right order.

If your change from Step 3 didn’t do what you expected it to do, that’s another avenue for discovery. If you think the code is doing something spooky, like changing what it does based on the presence of a debug statement, it’s probably not. If you’re sure that an object is in a certain state when it enters a function, and then later on in that function it’s broken, something in the preceding lines has changed it. Breakout the debug statements and figure out where. See if a function you’re calling is creating unintended side-effects somewhere else.

Step 5 – Repeat, for Science!

For a nasty bug, you’re going to be stuck in this cycle for a while. The important part is ensuring that you’re always being productive. Once you’ve found something strange, figure out why. Be downright suspicious of your own code, and don’t trust your past self. Sometimes, the worst bugs are caused by writing “transform.z” when you meant to write “transform.x” and – like an assignment you’ve been working on for too long – the typo is all but invisible to you. Remember to not just flail about changing random lines to see if they help. Be deliberate, and make changes that will answer the questions you have.

Finally

There are three general types of bugs I’ve found. Straight-up typos like the one mentioned above might make you feel like an idiot, but it’s just a (mostly) harmless mistake. Other bugs reveal a hole in your system; a use-case or scenario that you hadn’t considered that now needs to be taken care of properly. The most malicious will reveal that your best-laid plans are for naught; despite your best intentions, something about your code simply doesn’t work on a basic level.

It’s always important to remember that just because there aren’t run-time errors does not mean that every thing is fine. If a bug reveals a rotting hole in your roof, you should check the rest of the structure for similar water damage. Where else was the culprit function called? Are the error-causing side-effects actually required in those cases? Just ensuring that your code doesn’t throw any errors is tantamount to throwing some plywood over the hole and calling it a day. It is just going to make it harder to understand and fix the problem the next time something caves in. Ideally, the programs we architect are the examples of the best way to handle something. In reality, of course, that will almost never occur, but it is still an ideal to shoot for.

Freedom of Motion Alpha 3

by Taylor Hadden | 19:03

The Climbing Update

The time has finally come for a new release! Alpha 3 brings a host of changes, but the centerpiece is the new climbing system lightly discussed in this post. In short, you can climb on any ledges found in the voxel data surrounding the player, dramatically opening up the movement possibilities within a world. As always, this is very early software, and all assets are placeholder “programmer art.”

An incomplete changelist:

  • Support for climbing on ledges, including
    • Individual control over grabbing a ledge with your left and right hands
    • Pulling up from ledges
    • Moving between ledges and around corners
    • Jumping from ledges
    • Vaulting over ledges now uses the hand button inputs
    • Drop to hanging from a ledge from above from a crouch or slide
    • Full network support
  • Block editing is no longer constrained to the internal octree grid.
  • An air “woosh” sound was added when moving and falling quickly
  • Arm and leg IK algorithm was made more consistent and reliable
  • Separated editing features into a distinct editing mode
  • Added flying when in editing mode
  • Greatly reduced the chance of the camera clipping into world geometry when crouch-walking into a 1-meter gap
  • Pausing the game actually pauses player movement and behaviors

Future Plans

The the focus for the next release will be on polishing the movement system and making it feel more like you are controlling a living creature. This will involve slowing many interactions, such as climbing along and between ledges, and smoothing any elements that are still rough around the edges, such as moving up and down stairs. Additionally, falling damage (and death) and level checkpoint mechanisms will be implemented. Along with that, we will also be developing more levels for you to explore, and we hope you do to! As with the previous alpha, you can follow our progress on Trello.

Update: Climbing Ledges

by Taylor Hadden | 16:12

I have a bad habit of not posting updates here on anything like a regular schedule. This should change going forward, and I plan on having new blog post at least once a month if not more. The next alpha is not quite ready to go, but I do want to give you a little peak into the new climbing features I’ve been working on.

Tracking Ledges

To my knowledge, there are two common ways of determining what is climbable in a game. The first involves constantly checking the surrounding collision looking for something that the system considers to be a “ledge” or other climbable object. This has the advantage of theoretically working for any terrain, but can be difficult and computationally expensive to implement. The other – and I think more common – approach relies on hand-placed logical nodes that tell the system that a certain surface or ledge is climbable. This is often more reliable, as ledge traversal code can ask very specific questions to tailor-made objects, but it has the disadvantage of requiring a human to mark all of the objects that the player can climb on.

Freedom of Motion now features a hybridized version of those two approaches. The game analyzes the immediate area around the player, using the voxel data of the world to discover ledges. It builds a collection of Ledge objects that keep track of how wide and how deep the ledge is, as well as the distance to the ground from the ledge and a few other pieces of relevant information. With this map of the immediate area, the climbing code can make simple queries against a relatively stable set of information.

Ledge Debug View

Here you can see a debug view of the ledge data around the player, with the discovered ledges highlighted in green. The green wire box denotes the search area for the system. Ledges are built and recycled as their terrain enters and leaves the search area. Since this information is cached, we avoid expensive physics-based computation such as the ray casts and capsule casts that powered the previous vaulting functionality.

Using Ledges

In theme with my previous post concerning code dependencies, the code that generates the ledges and the code that uses them are separated from each other. The state machine that manages all of the ledge-related movements expects a simple interface injection (ILedgeCollection) and knows nothing about the underlying voxels. A separate object (FoGLedgeCollection) implements ILedgeCollection and handles traversing the voxel octrees and responding to data changes. This separation of two very complex concerns means that the movement code isn’t tied to a particular data source; it doesn’t care how the ledges got there, just that it can read them.

Currently, the system supports vaulting over ledges, hanging from ledges with one or two hands, leaping from ledges, climbing up ledges, climbing between ledges, and dropping to a ledge from a side or crouch. Still to be added before Alpha 3 is network support for the climbing code so that remote players appear to be performing the correct actions.

In addition to climbing, this data can be used in other ways. For example, the current core movement system has severe trouble with standard steps. Eventually, the ledge data will be leveraged to allow the player to move smoothly up and down half-meter gaps. As always, you can follow my development via the release’s Trello board.